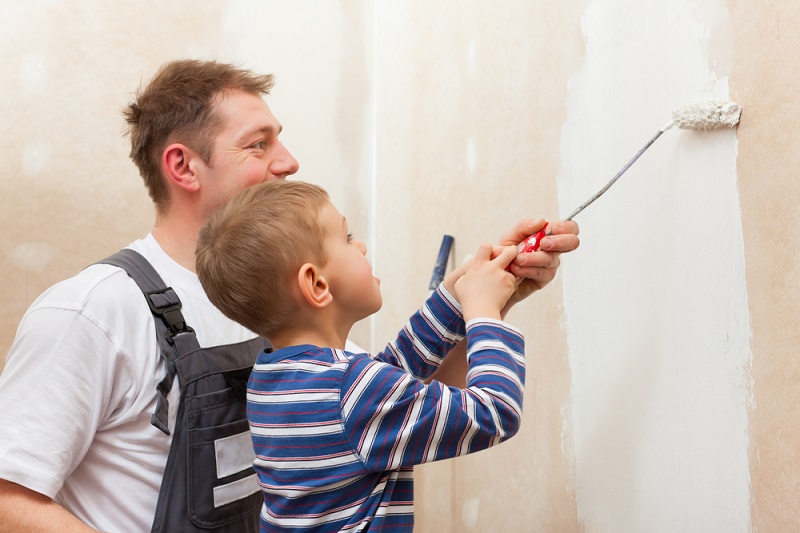
Hey there, homeowner! Are you ready to embark on a colorful journey with your little ones? Painting your house with kids can be both a daunting and rewarding experience. It’s a chance to bond, create lasting memories, and give your home a fresh, vibrant look. But before you dive into the paint cans and brushes, let’s walk you through the process in a fun and straightforward way.
Why Should You Paint with Your Kids?
Before we start talking paint colors and brushes, let’s address the elephant in the room – why should you even involve your kids in this DIY adventure? Well, there are plenty of good reasons:
- Quality Time: Painting together is an excellent opportunity to spend quality time with your children. It’s a chance to chat, laugh, and enjoy each other’s company.
- Creativity: Painting encourages creativity and imagination in kids. They get to express themselves through colors and designs, boosting their confidence and artistic skills.
- Responsibility: It’s a great way to teach your kids about responsibility. They’ll learn to handle tools, follow instructions, and take pride in their work.
- Teamwork: Painting is a team effort. Your family will work together to transform your home, fostering a sense of unity and cooperation.
- Memories: These moments will become cherished memories. Your children will always remember the day they helped paint the house.
Now that you’re convinced, let’s roll up our sleeves and get started.
Choosing the Right Time
The first step is picking the perfect time to paint. You want to ensure everyone is in the right mood, and you have enough daylight. Weekend mornings or during school holidays are ideal.
Picking the Paint Colors
This is where the fun begins! Gather your little ones around and let them be a part of the color selection process. You can show them paint swatches and ask for their input. Make it a mini art class by explaining primary and secondary colors.
Tip: Consider choosing washable, kid-friendly paints for any touch-ups that might be needed.
Preparing the Area
Before you dive into the colorful adventure, you need to prepare the painting area. Here’s how:
- Clear the Space: Remove furniture, decorations, and any obstacles from the room you’re painting. Cover anything that can’t be moved with plastic sheets or drop cloths.
- Safety First: Equip your little painters with aprons or old clothes that can get messy. Also, don’t forget safety goggles to protect their eyes from accidental splatters.
- Ventilation: Ensure good ventilation by opening windows and doors. Paint fumes can be strong, so it’s essential to keep the area well-aired.
Gathering Supplies
Now that the stage is set, it’s time to gather your painting supplies. Here’s a checklist of what you’ll need:
- Paint: Get the chosen paint colors in the finish (matte, satin, or semi-gloss) that suits your preference.
- Paint Brushes: Invest in a variety of brushes, including small ones for detail work and larger ones for broad strokes.
- Paint Rollers: For covering larger areas quickly.
- Painter’s Tape: To protect edges and create clean lines.
- Paint Trays: For holding the paint while you work.
- Drop Cloths or Plastic Sheets: To protect the floor and furniture.
- Paint Stirrer: To ensure the paint is well-mixed.
- Roller Pans: For the paint rollers.
Getting Ready to Paint

Now, here comes the exciting part – it’s time to paint! Before you dip those brushes in paint, here’s a simple step-by-step guide:
- Dress for Success: Make sure everyone is wearing their painting attire and goggles.
- Tape and Protect: Use painter’s tape to protect areas you don’t want to paint. This includes door frames, windows, and baseboards. Explain to your kids that it’s like putting up barriers to keep the paint where it belongs.
- Mix the Paint: Give the paint a good stir to ensure it’s well-mixed. This is a great opportunity to show your kids how to prepare paint properly.
- Start with the Base Coat: Begin with the base coat. It’s usually a lighter color and covers most of the wall. Encourage your little ones to take turns painting the lower sections where they can reach easily.
- Have Fun with Colors: Once the base coat is dry, let your kids have fun with the accent colors. They can paint patterns, shapes, or even their own little artworks on the walls.
- Take Breaks: Painting can be tiring, especially for little hands. Take regular breaks to rest, rehydrate, and admire your progress.
Clean-Up Time
The painting is done, and you’ve created a masterpiece together! But before you celebrate, it’s time to clean up. Here’s how to make it quick and easy:
- Clean the Brushes: Rinse the paint brushes and rollers thoroughly with water. Make sure there’s no leftover paint.
- Remove Painter’s Tape: Carefully peel off the painter’s tape while the paint is still slightly damp. This ensures clean lines.
- Put Everything Away: Store the paint cans, brushes, and other supplies properly. Teach your kids the importance of taking care of their tools.
- Wash Up: Have a group wash-up session. Scrub off any paint splatters from skin and clothing. It’s like a mini art class in the sink!
Admire Your Handiwork
Now, take a step back and admire your freshly painted walls. You did it! You and your kids transformed your living space into a work of art.
FAQs (Frequently Asked Questions)
- Is it safe for kids to paint with regular house paint?
Yes, it’s safe for kids to paint with regular house paint as long as you choose non-toxic, low-VOC (volatile organic compound) paints. These paints are designed to be safe for indoor use and won’t emit harmful fumes. Additionally, provide proper ventilation during the painting process, and make sure kids wear protective clothing and goggles to prevent paint splatters on their skin and eyes.
- What if my kids make a mess while painting?
Messes are part of the fun when painting with kids! Have some wet wipes or damp cloths on hand to quickly clean up any spills or drips. It’s also a good idea to cover the floor and furniture with drop cloths or plastic sheets to protect them from accidental paint splatters.
- How can I involve kids of different ages in the painting process?
You can involve kids of different ages by assigning age-appropriate tasks. Younger kids can use smaller brushes for detail work or help with stirring paint, while older kids can handle larger brushes and even create more intricate designs or patterns on the walls. Encourage teamwork and collaboration among siblings of different ages to make it a fun family activity.
- Can we paint more than just walls?
Absolutely! You can paint more than just walls. Consider painting furniture, wooden accents, or even outdoor structures like a wooden fence or a playhouse. Just make sure to use the appropriate type of paint for the surface you’re working on.
- What if my kids lose interest halfway through the painting project?
Kids can have short attention spans, so it’s possible that they might lose interest during a long painting project. In such cases, try to keep the atmosphere light and fun. Take breaks, offer snacks, or play some music to keep the energy up. You can also set achievable goals and let your kids take pride in completing smaller sections of the project. Remember, the goal is to have fun and create lasting memories together.
Final thoughts
So there you have it, a step-by-step guide to painting your house with kids. It’s a creative adventure filled with laughter, teamwork, and colorful memories that will last a lifetime. So grab those paintbrushes, put on your painting clothes, and let the fun begin! Happy painting, and may your home be filled with love and vibrant colors.